Introduced in version 4.0.1 – Available only for the Pro and Premium versions
About the Support Painting #
Sometimes, creating large amounts of support can be time-consuming, click by click. This is especially true for certain types of surfaces, such as a flat model base or any geometrical shape.
With the Support Painting option, you can continuously create supports that follow the path of your mouse or your pen tablet stylus.
In addition, you can modulate either :
- the distance between your supports, either in a constant way or by using the pressure of a graphic tablet stylus.
- The preset type (Light, Medium, Heavy), but only by using the pressure of a pen tablet stylus.
We strongly encourage you to use this painting mode which will save you time, especially on large models.
Usage #
Support Painting is a series of functions dedicated to the creation of manual supports, they are found in Prepare > Support > Manual.
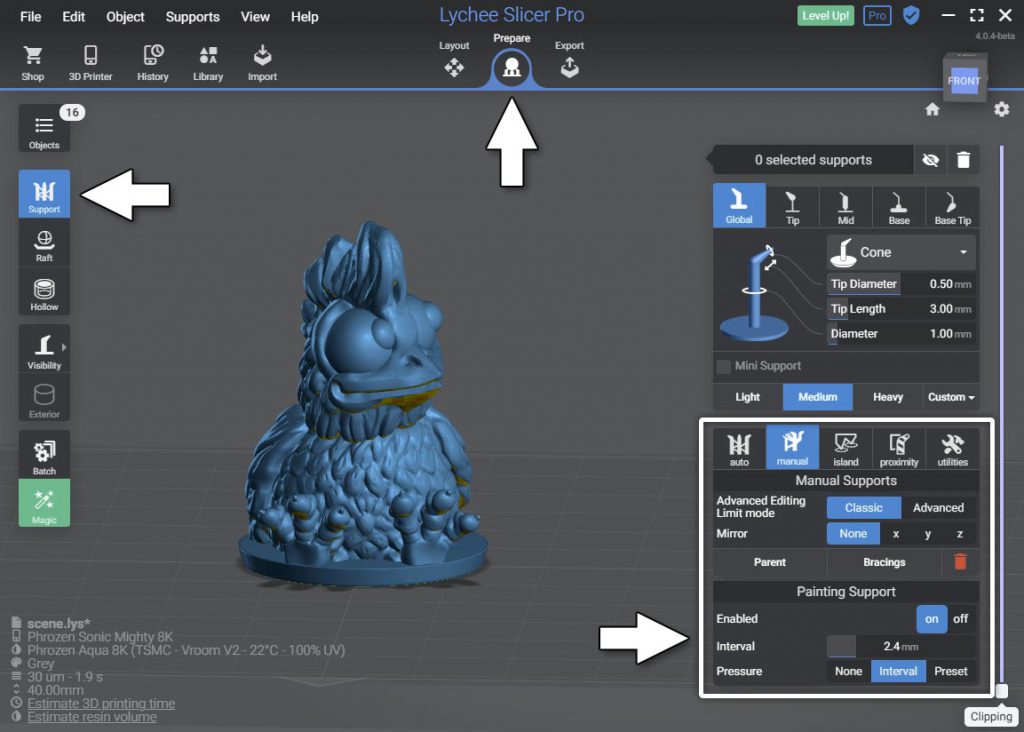
Click the On button to activate the mode. At first glance, you won’t notice any difference from creating manual supports if you perform the same actions you did before.
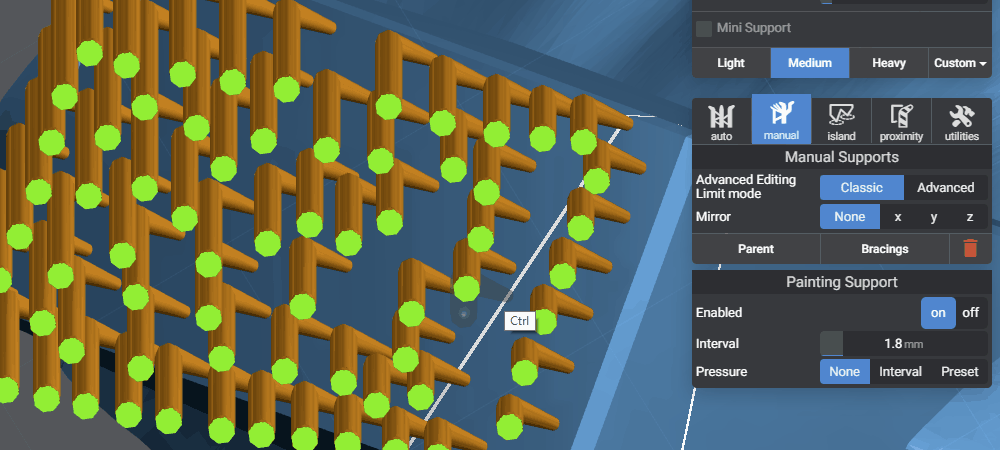
However, from now on, if you drag and drop when creating supports, you will notice a new behavior: a circle will appear, and supports will be created on the fly.
Once the click is released, your supports will be created and remain selected. You are free to modify this selection’s parameters or start a new path.
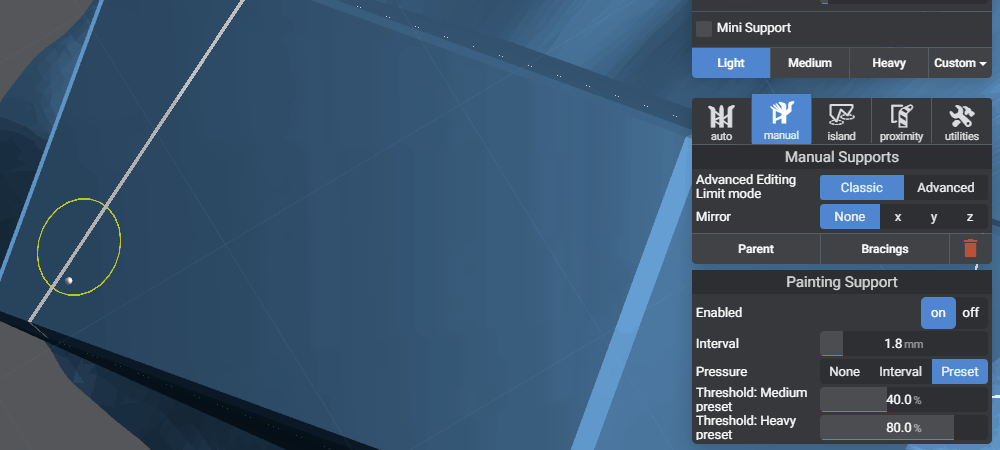
The circle displayed when the path is created shows the distance between the created supports. Once the circle passes the previously created support, a new support will be added.
In the end, you can create supports by click and drag or by a simple click, leaving you the choice of speed or precision.
This painting mode is modulated by various parameters described below.
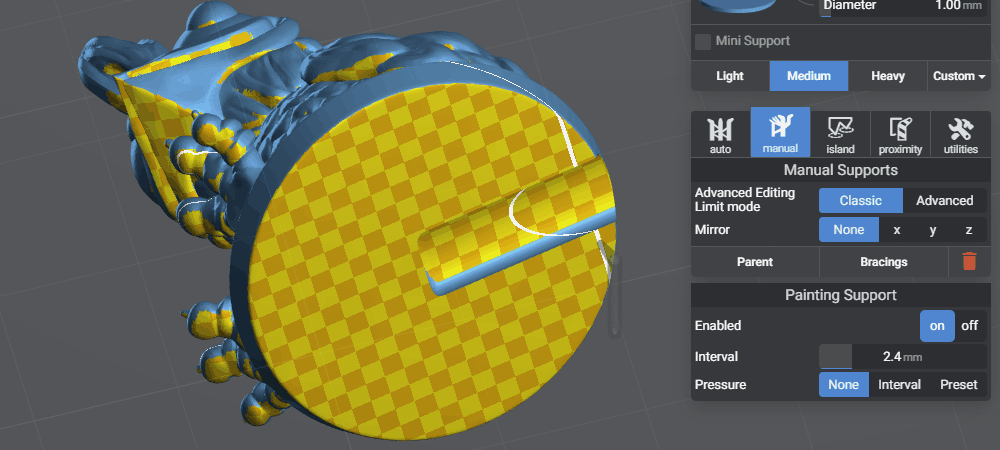
Automatic placement of supports in painting mode #
It is important to remember that the painting system can easily add too many supports, potentially with supports added too close to each other.
To limit this potential problem, Lychee Slicer analyzes the presence of existing supports when placing new supports and will restrict their creation if a support is already present in the area where a new one should be created.
However, this system may prevent you from creating a support where you want it to be, thus creating a higher density of supports. In this case, remember that you can simply click to add a support exactly where you want it to be.
Keep in mind that this painting mode is convenient for speed, but for accuracy and control, nothing will change the placement with a single click.
Support Painting Settings #
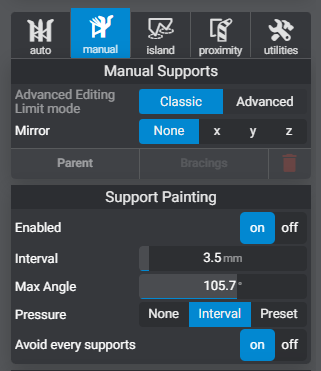
Interval (distance) #
This slider allows you to define the distance between the current and the next support.
Be careful to remember that it is not always obvious what the ideal distance between supports is. Feel free to use the Layer Thickness Preview mode (located in the View Cube options) to estimate the ideal distances for your project.
Max angle #
It lets you define an angle that will limit where you can place supports based on this value. The value goes from 0 (you need to be coplanar) to 180 which let you place supports anywhere.
A more particle example: If you start placing supports, and have a value lower than 90 degrees, you will not be able to place support on the other faces of the cube. Same if you place supports on the face under a base of a figurine, having a value lower than 90 will let you paint close to the border without placing supports on the sides.
Pressure: None #
This mode disables pen pressure management. It corresponds to the use of the mouse, which cannot modulate parameters. The mouse click corresponds to a pressure of 100%.
Pressure: Interval #
This mode uses the pressure of the pen tablet stylus to modulate the distance between the created supports. Low pressure will bring the supports closer together, while high pressure will move them further apart.
This allows you to choose better the density of the supports you will paint according to the design of your model.
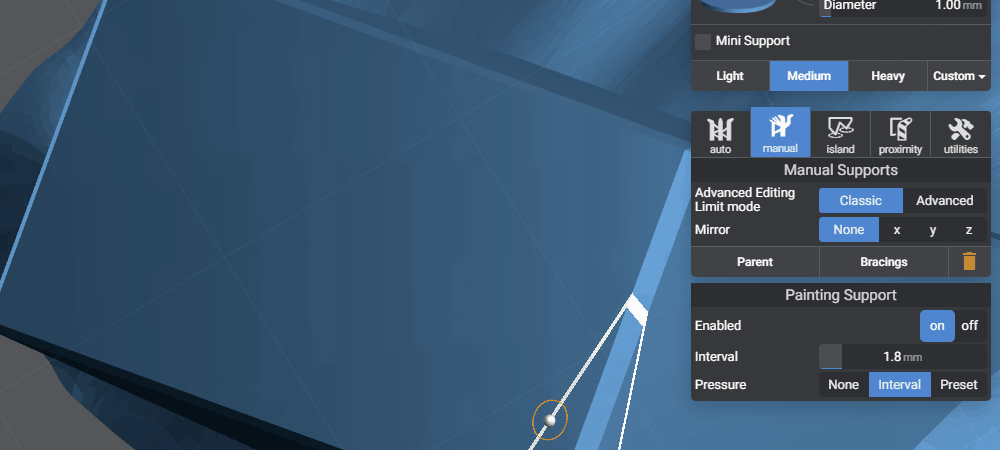
The interval generated by the pressure will go from 0mm of distance (zero pressure) to twice the value defined by the Interval slider.
For example, for an Interval value of 5mm, the pressure will allow setting a distance between 0 and 10mm between two supports.
Note that the circle’s diameter representing the interval changes size in real time according to the pressure applied.
This mode only works if you use a graphic tablet with pen pressure management.
Pressure: Preset #
This mode uses the pressure of the graphics tablet pen to choose which support preset you will use. Low pressure will choose the Light preset, medium pressure will choose the Medium preset, and finally, high pressure will choose the Heavy preset.
However, it can be difficult to feel the right level of pressure to apply to the stylus to be in the right preset. That’s why two threshold sliders are available when the Preset mode is activated. They will allow you to define the sensitivity according to your taste but also according to the sensitivity of your tablet.
Only the threshold for the Medium and Heavy presets are available, with the Light preset starting at 0 pressure.
We advise you to do some tests to find the right setting.
This mode only works if you use a graphic tablet with pen pressure management.
Deleting supports #
Support painting adds supports by default, but by pressing and holding the CTRL key in paint mode, you will be able to remove supports located in the path of your brush.
Painting supports using the Continuous mode #
As a reminder, the Continuous mode (via the Alt+Shift keys) allows you to create continuously new supports based on the selected support that shares the same starting point. This mode is often used to make mini support fans.
The paint mode is also compatible with this Continuous mode. For example, create a mini support, press Alt+Shift and paint other support tips: all these tips will be minis that will have the base of the original mini support as their starting point.
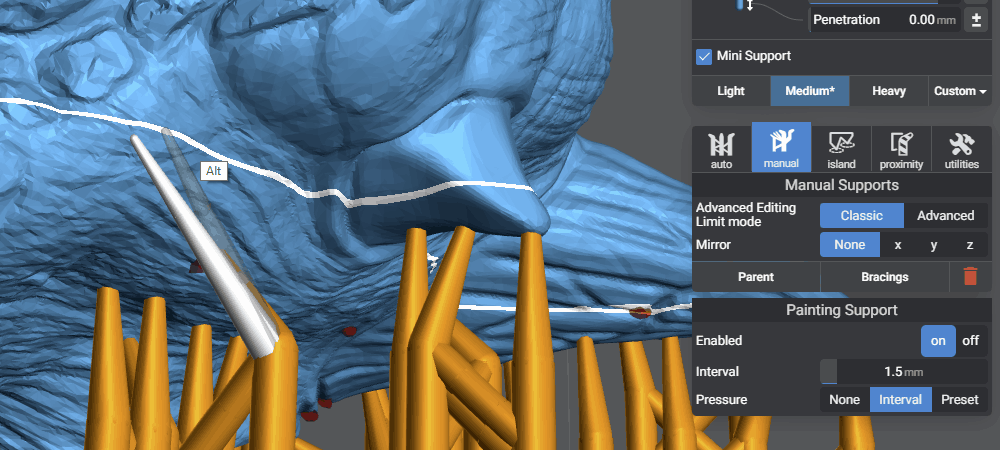
Model by Lakelotr.
Working with a pen tablet #
Lychee Slicer is compatible with many pen tablets. However, our development is based mainly on Wacom tablets.
If you do not have pressure management with your tablet, check these two points:
- On Windows, make sure Windows Ink is enabled.
- Install the latest driver from the manufacturer of your graphics tablet.
Note: on Windows, you will have lots of annoying little circles and visual feedback added by Windows Ink. If you have the miracle solution to hide everything without disabling Windows Ink, share the information with us!