Introduction to the Layers Thickness Preview function #
It is not always easy to estimate the thickness of the layers of the 3D model to be printed. Therefore, it is even more challenging to estimate the size of the layers in proportion to the supports’ tip size.
The Layers Thickness Preview function complements other Lychee Slicer functions, allowing you to better understand your future print by representing the actual thickness of the layers.

Note: As a reminder, the Pixel Perfect mode in the View menu allows you to see the border pixels of each layer when using the clipping bar.
Activating the Layers Thickness preview mode #
To activate this mode :
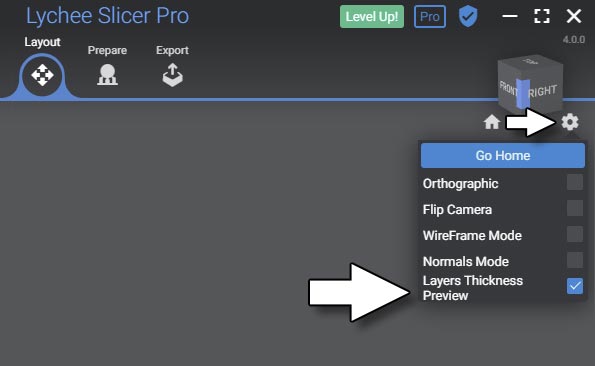
- Click on the gear icon at the navigation cube’s bottom right. The cube is located at the top right of the application interface.
- A dropdown menu appears, offering different display options. Click on the Layers Thickness Preview checkbox: this will change the display of your 3D model and show the layers individually.
- This display mode remains active until you turn it off. You must perform the same steps as enabling this mode to disable it.
Display… and simulation! #
Please keep in mind that this mode is a simulation of the thickness of the model layers. There may be a slight variation between the previewed layers and the future printed layers of the model.
However, this is to help you better understand the ratio between layer thicknesses and other printed elements, such as support tips.
Display performance #
This mode, once activated, will require more resources from your computer. We advise you to keep it activated only occasionally if you notice a degradation of the display performance, especially if your hardware configuration is limited.
This display mode adds a lot of horizontal lines so that a moiré effect may appear. This is quite normal, and zooming in quite close to your model may be necessary to limit this effect.
Finally, the closest parts of your 3D model may disappear gradually depending on the zoom factor. If this is the case, press the F key on your keyboard to recalibrate the 3D view.
An example showing the benefits of displaying layers #
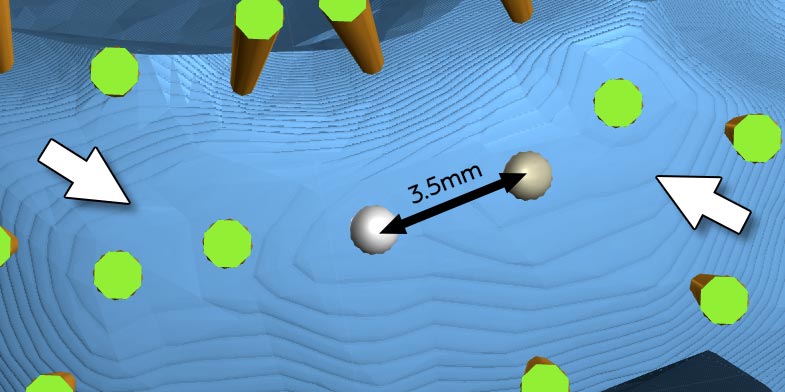
You can see a model in the bottom view in the image above, with the layer thickness preview enabled. The layers are 30 microns thick.
You can see that the distance between the two selected substrates is 3.5mm, or about ~100 times wider than each layer’s thickness.
The white arrow shows that the first few layers expand widely with each new layer added. Because they are very thin (30 microns), the risk of deformation during the peeling process is very high.
Thanks to this mode, you will be able to understand your model better and thus, limit the deformations or the risks of tearing your supports.