About #
This article is a step-by-step guide on how to add a new profile for a filament 3D printer you just bought or a custom build using the wizard.
Usage constraints #
This feature is available in Lychee Slicer Free, Pro, and Premium.
Note: Lychee Slicer currently supports single extruder 3D printers and Cartesian (including Core XY) and Delta 3D printers.
Multi-extruder printers and Belt-type printers will be added in the future.
Usage #
How to access the wizard: #
The process is similar to adding a profile for a printer already available.
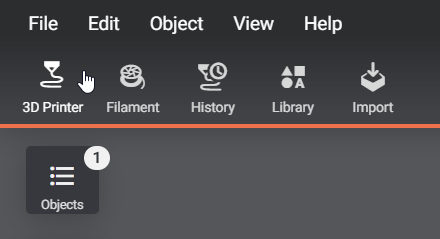
- Open the printer list window by clicking on the 3D printer button located in the top left corner.
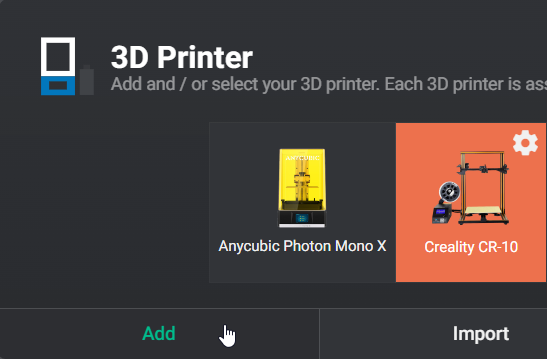
- Click on the Add button under the printer list.
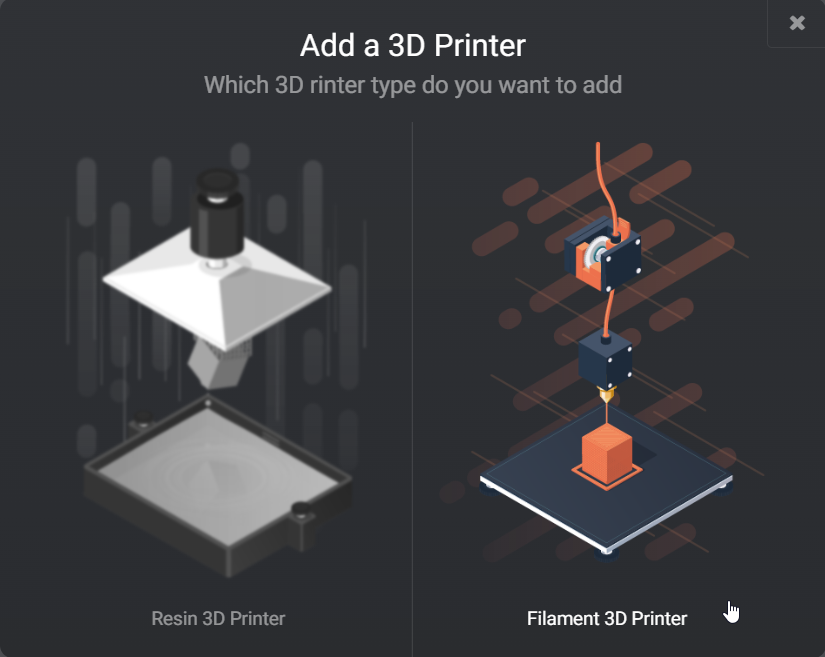
- Select the filament 3D printer type.
- Scroll down to the bottom of the list to find the Custom Printer Preset.

- The wizard opens, and you can start the process.
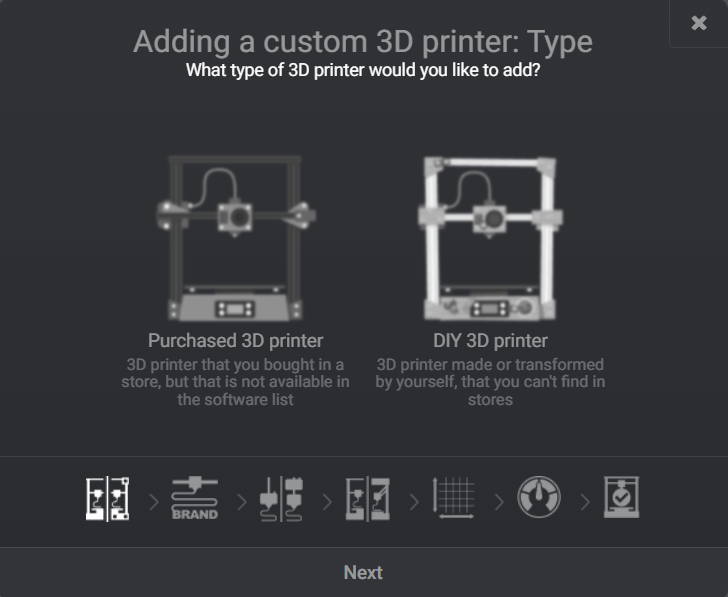
What’s the difference between a profile for a purchased or a custom 3D printer profile: #
You can create a profile for a purchased 3D printer that is not already available as an official profile in the slicer. It will help us add these profiles for the other users for this printer as all the profiles are synched with our cloud feature.
The other option is to create a new custom profile for a modified 3D printer or a fully custom one. Both processes are similar.

The wizard, steps overview: #

- Once you have selected between a purchased 3D printer or a custom, click on the next button to continue.
- Select the brand from the drop-down menu or create a custom name. Same for the printer name.
- Select the extruder type, Bowden, or Direct Drive.
Bowden will have a tube between the motor of the extruder and the print head.
A Direct drive will have the extruder motor mounted directly on the print head. - Select the category of 3D printer, Delta, Cartesian, Core XY.
- Change the build volume size. The banana is here to help you have a sense of scale.
- Select a speed preset that your printer can handle.
You can use the speed provided by the manufacturer or select a slow speed to have a more reliable experience.
You can tweak the profile later if you want to increase the print speed. - The last step is a summary before you validate the profile creation.
Additional information: #
- Make sure you use the official name of the printer as much as possible when you add a purchased printer, as this profile may help us add more and faster 3D printer profiles for the community.
- Your profile will be saved locally on your computer. You can export it to have a backup or share it.
- You can create a new custom 3D printer profile by duplicating an existing one in the printer preferences.
